Gifting has never been easier
Perfect if you're short on time or are unable to deliver your gift yourself. Enter your message and select when to send it.

Ready to bring some summer vibes into your space and add a splash of personality? Hanging a pendant light cord is your chance to brighten up any room with style and flair, all by yourself!
No need to call in the pros—this DIY project is doable as long as you follow Rowabi's guidance. Get ready to turn your ideas into reality and let's light up your world together!
So, this project aims to guide you through safely and efficiently hanging a pendant light cord. Pendant lights are incredibly versatile and can add character to any room, whether it's the kitchen, dining area, bedroom, or living room. It's like giving your home a fresh new look, ready to welcome guests for a vibrant summer season.
| Time | Cost | Level |
| 1 to 3 hours in total | $100 to $350 depends on the pendant light cost | Beginners with some basic DIY skills |
First up, we'll go through the list of tools and materials you'll need to complete this project smoothly. Rowabi has also outlined the purpose of each so you can easily understand their function.

Be prepared to hang your pendant light cord. Source: LinkedIn (1)
In addition to choosing the right pendant light itself, you also need to consider selecting a pendant light installation that complements your space’s unique style and design preferences.
This helps in creating the perfect ambiance for your home:
Cable: Sleek and modern, cable installations use thin steel cables to suspend the light fixture, creating a minimalist and contemporary look. Adjustable cables allow for customizable hanging heights, ideal for modern homes or spaces with clean lines.

The cable will be thin, long, and easily adjustable in length. Source: Grace & Grey (2)
Cord: Versatile and easy to install, cord installations utilize a flexible electrical cord to hang the pendant light. Adjustable cord lengths suit various ceiling heights and locations, working well in both modern and traditional settings. Customize the look with decorative elements like fabric covers or knots.
Wire: Similar to cord installations, wire installations feature a structured setup with visible wiring, adding an industrial or eclectic touch. Thicker and more rigid than cords, wire installations are perfect for lofts, studios, or industrial-themed spaces.

You will find the wire thick and sturdy. Source: EPBOT (3)
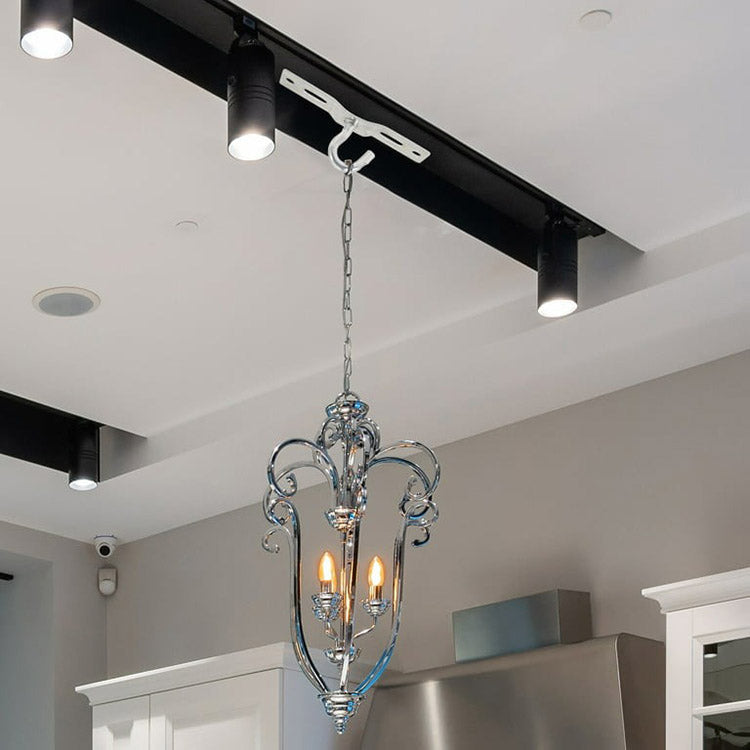
Chain: Classic and elegant, chain installations use a metal chain to hang the light fixture, providing a traditional look with rustic accents, perfect for dining rooms or foyers. Easily adjust the fixture's height by adding or removing links for customization.

By using a chain, you will achieve a modern, rustic, and industrial look that stands out from other types. Source: Barn Light Electric (4)
Stem: Sturdy and polished, stem installations use a rigid metal rod or tube to suspend the pendant light, providing a clean and structured appearance. It is ideal for spaces requiring a permanent and stable fixture, such as kitchens or offices.

A stem provides a more sturdy, solid, and secure feel for the lights. Source: Pinterest (5)
Hanging a pendant light is an incredibly exciting and rewarding DIY project that will transform your space with stunning ambiance and style. With a little basic electrical safety knowledge and a keen eye for balance, you can confidently follow this guide to successfully install pendant lights at home without any assistance:
Select the ideal spot for your pendant light, considering the room's layout, light functionality, and design aesthetics, for the most visually appealing and functional placement. Measure and mark the exact ceiling location, ensuring a compatible ceiling box is present to safely support your beautiful new fixture.

Find the right position you want to achieve first. Source: Best Buy Lighting (6)
Refer to general hanging height guidelines for optimal placement that enhances the look and feel of your space.
Before starting, always turn off the power to the existing light fixture at the circuit breaker to ensure a safe working environment. Use a reliable voltage tester to confirm the wires are not live, giving you peace of mind and protection throughout the installation process.
Carefully observe and document the wiring configuration of the old fixture, typically consisting of black (hot), white (neutral), and green or bare (ground) wires, to ensure a smooth and accurate installation.
Make a clear record of any additional wires or connections for easy reference, allowing you to work efficiently and confidently.

Knowing which wire serves each purpose helps in reconnecting them correctly. Source: Family Handyman (7)
Safely remove the existing fixture by unscrewing it from the mounting bracket or ceiling box, taking care to support the fixture as you work.
Gently disconnect the wires, ensuring no damage occurs, and appreciate the opportunity to upgrade your space with a stunning new pendant light.
Attach the new mounting bracket to the ceiling box, ensuring it is perfectly centered and level for a professional-looking installation.
Use additional hardware if needed for compatibility and stability, giving you confidence in the safety and longevity of your new fixture. Double-check alignment for a perfectly straight hanging pendant that will look amazing in your space.
Secure the new mounting bracket firmly to the ceiling box to ensure the light fixture is stable. Source: Walmart (8)
Connect the pendant light wires to the corresponding ceiling box wires: black to black, white to white, and green or bare to ground, ensuring a secure and reliable connection. Secure connections with high-quality wire connectors and wrap them with electrical tape for added safety and peace of mind.
Align the pendant light with the mounting bracket and secure it using the provided screws or nuts, creating a strong and stable installation. Use a level to ensure the fixture hangs straight and tightens securely to prevent any wobbling, allowing you to enjoy your new pendant light with confidence and pride.

Ensure the light fixture is securely hung to ensure long-term use. Source: Illumination UK (9)
Insert the recommended light bulbs and turn the power back on at the circuit breaker, watching with excitement as your new pendant light illuminates your space. Test the light to ensure proper functionality and make any necessary adjustments, fine-tuning your installation for optimal performance and style.
For rooms with 8ft (2.4m) ceilings, aim to hang your pendant lights between 12-20 inches (30-51cm) below the ceiling. This will provide a comfortable 7ft (2.1m) clearance between the floor and the bottom of the pendant, allowing for easy movement and a spacious feel. If you're blessed with higher ceilings, simply adjust the wire length to maintain this ideal clearance.
When hanging pendants over dining tables or kitchen islands, the sweet spot is about 30-36 inches (76-91cm) above the surface. This height ensures a cozy and intimate atmosphere, perfect for enjoying meals and conversations with loved ones.
Of course, every room is unique, so feel free to make adjustments based on your specific requirements and personal style. The key is to find the perfect balance between functionality and aesthetics.
If you're looking for more expert advice and inspiration, we have a wealth of information addressing various questions and concerns about pendant light height, ensuring you can create the space of your dreams with confidence.
Head over here: What Height to Hang Pendant Lights and Chandeliers
Looking to add a touch of creativity to your space? Here are some innovative ways to hang a pendant light with a cord that will instantly elevate your decor.
Create a stunning rustic or nautical theme by swapping out the standard cord with a beautiful decorative rope. With a variety of rope styles and colors available, you can easily find the perfect match for your decor. Securely attach the rope to the ceiling canopy and fixture for safety.

You can repurpose leftover rope in your home to hang lamps, which looks exceptionally beautiful. Source: Pinterest (10)
Elevate your pendant light game by installing pulleys on the ceiling for incredible adjustability. With pulleys, you can effortlessly raise or lower your light fixture to the perfect height, making it ideal for spaces like kitchen islands where flexibility is key. This simple addition will make your lighting setup a breeze to customize and enjoy.
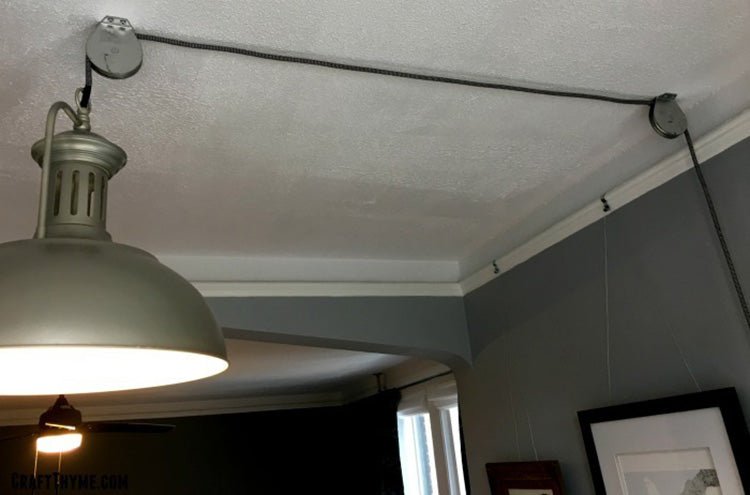
Small pulleys make it easy to adjust the length of pendant light cords effortlessly while adding a unique touch. Source: The Reaganskopp (11)
Incorporate a stunning decorative shelf bracket into your pendant light setup for a unique and eye-catching look.
By attaching the bracket to the ceiling and hanging your pendant light from it, you'll provide solid support for your fixture and add architectural interest to your space. Choose a bracket that perfectly complements your decor style for a cohesive and captivating look.

You can use this method to replace old study or bedside lamps, and it looks beautiful too. Source: Pinterest (12)
Create an elegant and soft lighting effect by draping your pendant cord around hooks or brackets on the ceiling instead of hanging it straight down.
Experiment with different draping patterns to achieve the perfect look for your space, adding visual interest and a touch of sophistication to your lighting setup.
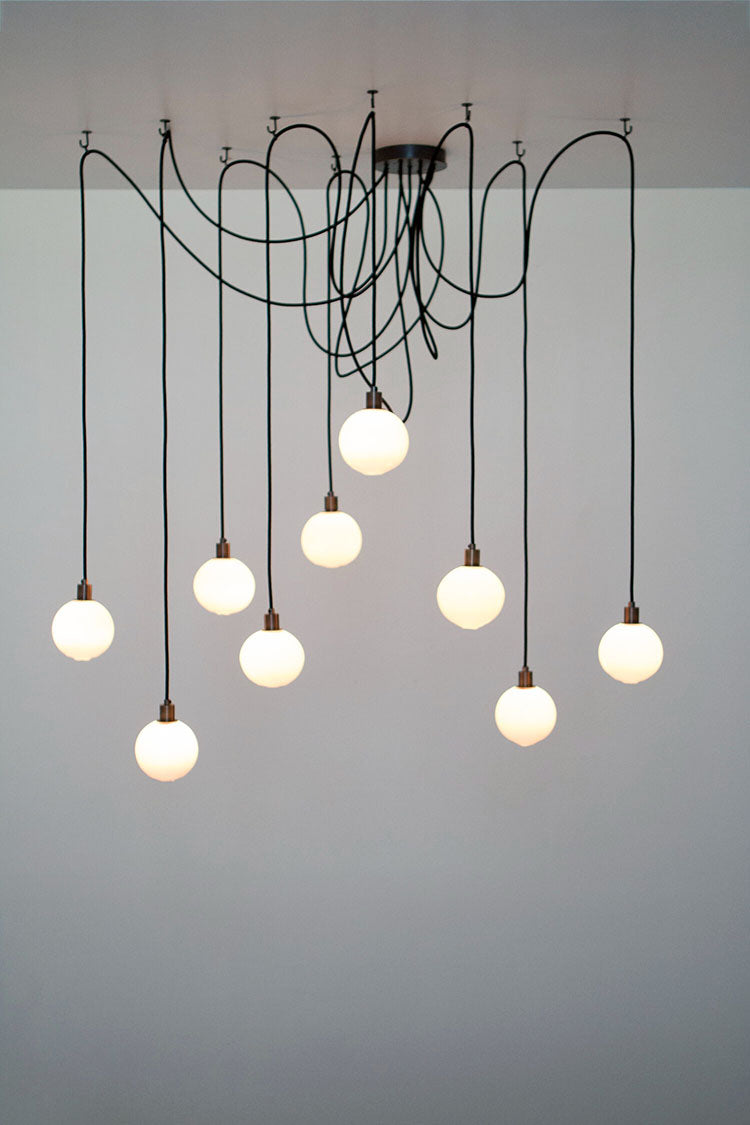
The cables create a unique drape and fill up unnecessary empty spaces beautifully. Source: Glass + Bone (13)
Add a delightful bohemian touch to your pendant light by stringing beautiful decorative beads along the cord. Choose beads that perfectly match your decor style and slide them onto the cord before installing the light fixture.
This simple addition will add texture, visual appeal, and a unique flair to your pendant light while cleverly concealing the cord.
If your pendant light cord is twisted or not hanging straight, don't worry! You can easily fix it with these simple steps. First, ensure safety by switching off the power to the pendant light at the circuit breaker.
Then, gently hold the cord and allow it to untwist naturally or carefully untangle it by hand if it's tangled.

The straight cords provide a neat, clean, and organized feel, so pay attention to them. Source: Architizer (14)
Alternatively, run your fingers along the cord to remove any twists. If the cord retains a curl or kink, use a hairdryer on low heat to warm the cord while holding it straight.
Once the cord is perfectly straightened, hang the light fixture back in place and adjust the cord to the desired length for a flawless and polished look.
Start by switching off the power at the circuit breaker for safety. Then, lower the fixture to the desired height by gently pulling down on the cord until you reach the perfect length.
Locate the adjustment mechanism near the ceiling canopy or within the fixture and loosen the set screw or adjust the locking mechanism to pull the excess cord through until you achieve the desired length.
Secure the cord in place using the adjustment mechanism and tighten any set screws. Finally, reattach the light bulb to the fixture and restore power to test the light, ensuring it functions properly and hangs at the perfect height for your space.
Installing wiring for a pendant light brings a delightful sense of accomplishment and transforms your space into a warm, inviting ambiance.
Follow this straightforward guide to ensure a successful installation that will illuminate your surroundings with elegance.

Be cautious when wiring a pendant light; pay close attention to the following steps to ensure success. Source: The Spruce (15)
Based in Houston, Texas, Rowabi is a beloved family-owned business with nearly five years of experience in the industry. We specialize in crafting exquisite rattan pendant lights and modern pendant lights, renowned for their exceptional quality and distinctive designs, suitable for any space.
Each of our products undergoes meticulous craftsmanship using premium materials, with extensive attention to detail and rigorous testing to ensure durability and lasting beauty. We take pride in delivering designs that not only meet the highest standards but also endure the test of time.
Feel free to explore our diverse collections of modern lighting and rattan pendant lights to discover options that perfectly match your taste and style preferences. We invite you to choose the perfect lighting solution for your space with us!
How to hang corded pendant lights?
How do you hang a pendant light fitting?
How do you hide the cord on a pendant lamp?
How to hang a pendant lamp without hard wiring?
What are the rules for hanging pendant lights?
How much weight can a pendant light cord hold?
How are pendant lights mounted?
Is it hard to hang a pendant light?
Can I hang a pendant light on the hook?
How do you extend the cord on a pendant light?
How do you hide a cord?
How to hide ceiling cords?
How do you hang a corded lamp?
Do you need an electrician to hang a pendant light?
How do you secure a heavy pendant light?
So, there you have it! Hanging a pendant light cord is a super satisfying DIY project that can revamp your space in no time. With just the right tools, materials, and a sprinkle of patience, you can bring light and style into any room, all by yourself! Just keep safety in mind, take your time, and make sure everything's set up properly.
Now armed with these tips from Rowabi, you're all set to brighten up your space and cozy up under the warm glow of your brand-new pendant light cord!
Source:


Indoor Rattan Furniture: The Best Eco-Friendly Furniture of 2024
Rattan furniture indoor is an excellent option for furniture pieces that offer comfort, style, and durability. In this article, Rowabi lighting will offer you in-depth insights into this type of fu...
Read more
How to Install a Dimmer Switch | A Step-by-Step Guide
Installing a dimmer switch is an easy and impactful way to control the lighting in your home, giving you the power to create the perfect atmosphere for any occasion. In this step-by-step guide, Row...
Read more
Leave a comment
This site is protected by hCaptcha and the hCaptcha Privacy Policy and Terms of Service apply.