Gifting has never been easier
Perfect if you're short on time or are unable to deliver your gift yourself. Enter your message and select when to send it.

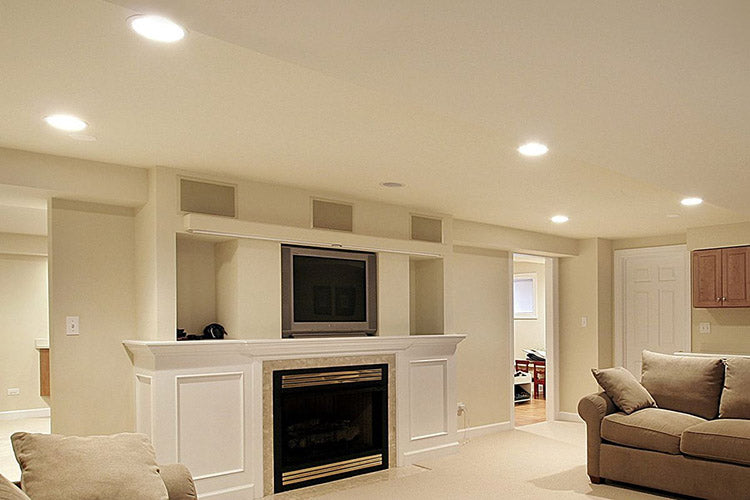
If you’re fed up with outdated lighting that just doesn’t cut it anymore, recessed lighting might be your solution. It’s efficient, stylish, and can significantly improve the look of any room.
This guide from Rowabi will walk you through the essential steps of installing recessed lighting, helping you avoid common pitfalls along the way. Let’s get to work and brighten your home the right way!
| Working time | Skill level | Total time | Estimated cost | Yield |
| 30-45 mins | Intermediate | 30-45 mins | $15 to $30 each | 1 recessed light |
First, you need to have a solid plan in place before officially starting the installation process:
Selecting the right fixtures is essential for achieving both functionality and style. Look for LED recessed lights that match your aesthetic preferences and fit the room’s design.

There are a variety of recessed lights available on the market today, featuring diverse shapes and designs. Source: My Design Sherpa (1)
Ensure the fixtures are rated for the installation type—IC-rated for insulation contact if applicable. Adjustable fixtures that allow for dimming or directional lighting are also beneficial, as they provide versatility in brightness and focus.
When budgeting for your recessed lighting project, consider the following costs:
Read in detail: How Much Does It Cost to Install Recessed Lighting in 2024
Before starting your installation, it’s crucial to check local building codes and regulations. Some jurisdictions require permits for electrical work, especially when altering circuits or making significant changes.
Compliance with safety regulations ensures a safe installation, so consult local authorities or a licensed electrician if you’re uncertain about the requirements.
Safety should always be your top priority during electrical work. Before beginning any installation, turn off the power at the circuit breaker. This precaution helps prevent accidents and ensures your safety throughout the process.
Additionally, use proper tools that are in good working condition, including a non-contact voltage tester to verify that the power is indeed off. Following the manufacturer’s guidelines for fixture installation and wiring is crucial to avoid hazards and ensure a safe and effective installation.
Understanding your existing electrical system is crucial for a safe installation.
Existing circuit
Start by evaluating the load capacity of your current circuit. Determining whether it can handle the additional load from new recessed lights is essential. Check the wiring type as well; typically, a 14-gauge wire is suitable for 15-amp circuits. Ensuring that your existing wiring is appropriate for the load will help prevent overheating and potential electrical hazards.
New circuit
If the existing circuit is insufficient for your needs, you may need to consider adding a new one. This process can be more complex and often requires professional assistance to ensure safety and compliance with electrical codes.
When planning for a new circuit, take the time to route the wiring properly from the breaker box to the installation site. Careful planning will facilitate a smoother installation process and help maintain the integrity of your electrical system.
Decide on the type of lighting that best suits your needs:

Depending on the temperature, each type will provide a different level of brightness and ambiance. Source: Dunbar’s Electric (2)
Before cutting into the ceiling, inspect the space above:

Since they are mounted directly on the ceiling, it's important to consider the ceiling's suitability for installation as well. Source: Vesoi (3)
Assess the type and condition of the existing wiring:
Determine the number of recessed lights based on the room’s size and lighting needs:
Calculate the distance to determine the appropriate number of lights needed. Source: LightUp.com (4)
Next, you need to ensure that you have all the necessary tools and materials to begin the installation of the lights.
When installing recessed lights, having the right tools is essential for a smooth and safe installation. Here’s a comprehensive list:

Calculate and prepare all the necessary materials to install the lights. Source: The Spruce (5)
Gathering the right materials will ensure you have everything you need for a successful installation:
Prepare your pen and paper, and have a good memory to keep track of the following steps so you can get started with the light installation.
Begin by evaluating the space and determining where additional lighting is needed. Consider factors such as room function and existing light sources. Ideal placements often involve spacing lights approximately six feet apart for optimal illumination.

Calculate and mark the placement of the lights. Source: Remodelando la Casa (6)
Clear the installation area of any furniture or obstructions. Use dust shrouds or drop cloths to protect surfaces from debris during installation.
If you are replacing an existing fixture, carefully remove it by unscrewing it from the ceiling and disconnecting the wiring. Always ensure the power is turned off at the circuit breaker before proceeding.

Carefully remove each old light fixture. Source: The Spruce (7)
Using a drill and hole saw, cut openings for the recessed lights. If the fixtures come with a mounting template, use it to guide your cuts for precision. Ensure you avoid any existing wiring or plumbing.
Cut a whole and drill a pathway. Source: Fix the Build That (8)
Drill a pathway from the switch box to the ceiling hole. Fish the wiring through this path, allowing for 12 to 18 inches of slack at each opening to ensure flexibility in connections.
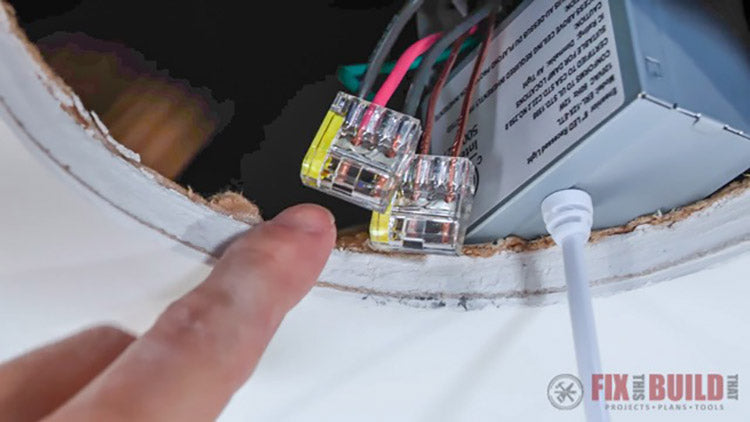
Open the junction box of the recessed light fixture and connect the wires. Match black wires (hot) to black, white wires (neutral) to white, and connect ground wires (bare copper) using wire nuts.

Reconnect each wire carefully; this ensures the new light fixture functions properly. Source: Pretty Handy Girl (9)
Securely tuck the wires back into the junction box and slide the recessed light housing into the hole. Use the clips or screws provided to hold the housing firmly in place against the ceiling.
Once the housing is secured, attach the trim piece to finish the look. Depending on the trim type, this may involve using coil springs or other fastening methods to ensure a snug fit.

Reassemble each part logically to ensure everything fits properly. Source: Family Handyman (10)
Depending on the fixture, either screw in light bulbs or install LED lamps according to the manufacturer’s instructions. Ensure you are using the correct wattage to avoid overheating.
If you are adding a new circuit, connect the new wiring to the service panel, ensuring that all connections are secure and meet local code requirements.
For fixtures requiring housing, follow the manufacturer's guidelines for installation. Ensure the housing is properly secured within the ceiling.
Once all installations are complete, turn the power back on at the circuit breaker. Test the lights to ensure they function properly. If you installed a dimmer switch, check its operation to confirm smooth dimming capabilities.

Test to see if the lights are working properly, and once confirmed, you're good to go! . Source: The Spruce (11)
When considering whether to call a professional for your recessed lighting installation, it's essential to recognize several key situations:
How to install recessed lighting with no attic or prior wiring?
Can I install recessed lighting myself?
Are recessed lights easy to install?
What are the rules for installing recessed lighting?
How much does it cost to put in a recessed can light?
Can I daisy chain recessed lights?
What are the disadvantages of recessed lighting?
Do recessed lights add value to a home?
Why is recessed lighting so expensive?
Where should you not put recessed lights?
How many 6-inch recessed lights do I need?
How far apart should 4-inch recessed lights be spaced?
How many recessed lights for a 10x10 room?
What is the most common size recessed light?
Can you have too much recessed lighting?
And there you have it—your guide to installing recessed lighting and transforming your space! Remember, though, while DIY can be a thrill, safety comes first—no one wants their weekend project to end in sparks! So grab your tools, double-check that breaker, and let your ceiling shine like the star of the show. Happy lighting!
Source of image:


[2024 Data] How Much Does It Cost to Install Recessed Lighting in 2024
Thinking about adding recessed lighting but worried about the price? In 2024, the cost to install lighting isn’t as steep as you might think! On average, the national cost hovers around $1,467, wit...
Read more
Recessed Light Fixtures: The Ultimate 2024 Guide for Choosing
Sick of stumbling around in poorly lit rooms that scream "outdated"? We hear you! The right lighting can make all the difference, and recessed light fixtures are the perfect solution to elevate you...
Read more
Leave a comment
This site is protected by hCaptcha and the hCaptcha Privacy Policy and Terms of Service apply.