Gifting has never been easier
Perfect if you're short on time or are unable to deliver your gift yourself. Enter your message and select when to send it.

Ever feel like your room could use a little facelift but don't want to dive into a full-blown renovation? Here's a fun and easy trick: change your pendant light shade! It's amazing how such a small tweak can make a huge difference in your space.
Ready to give your room a fresh new vibe in just a few simple steps? Let’s Rowabi lighting be your guide and light up your space with style!
A pendant lamp shade is a stunning decorative cover that enhances and directs light from a pendant fixture.
From the intricate glass and fabric designs of the early 20th century to today's diverse range of materials, including sleek metals and vibrant plastics, these shades offer endless possibilities for personalizing your space.

In recent years, rattan has become a popular material for making shades for pendant lights. Source: Khimjtravel (1)
The recent popularity of rattan and bamboo shades brings a touch of nature indoors, creating a warm, inviting ambiance that transforms any room into a cozy retreat.
While lamp shades aren't universally interchangeable, their diverse range of fittings and sizes offers exciting opportunities to customize your lighting. By matching the shade's specifications to your fixture's requirements, whether it's a spider, clip-on, or uno fitting, you can create a perfect, harmonious look.
Selecting the ideal size and shape allows you to complement your lamp base and room decor, resulting in a cohesive and visually stunning lighting arrangement that reflects your unique style.
Cleaning lamp shades is an art that varies depending on the material, offering a chance to refresh and revitalize your lighting decor. Rowabi's expert guide provides tailored cleaning techniques for fabric, glass, metal, and plastic shades, ensuring each type receives the care it deserves.

Different shade materials require different methods of cleaning and maintenance. Source: The Home Depot (2)
By following these specialized methods, you'll maintain the beauty of your shades and also extend their lifespan, keeping your lighting fixtures looking new:
| Type of Shade | Cleaning Method |
| Fabric shades | Dust regularly using a lint roller or a vacuum cleaner with a brush attachment to remove surface dust. Mix a mild soap with water and gently wipe the shade with a soft cloth for a deeper clean. Avoid soaking the fabric to prevent damage, and let the shade air dry completely. |
| Glass shades | Carefully remove the shade and wash it in warm, soapy water. Use a soft sponge or cloth to clean all surfaces. Rinse thoroughly with clean water to remove any soap residue. Dry the shade with a soft, lint-free cloth to avoid water spots. For extra shine, you can use a glass cleaner. |
| Metal shades | Wipe the shade with a damp cloth to remove dust and grime. Dry immediately with a soft cloth to prevent rust. For tougher stains or tarnish, apply a small amount of mild metal cleaner to a cloth and gently rub the affected area. Ensure no cleaner residue remains by wiping with a damp cloth again and drying thoroughly. |
| Plastic shades | Clean with a mixture of warm water and a few drops of mild soap. Use a soft cloth to wipe down the shade, then rinse with a cloth dampened in clean water to remove soap residue. Dry with a soft, lint-free cloth to avoid streaks or spots. |
Illuminate your space with the perfect lamp shade by following these expert tips for selecting the ideal size:
Height: Create a stunning visual balance by choosing a shade that's 60-70% of the lamp base height. A 20" base is beautifully complemented by a 12-14" tall shade.
Width: Achieve a captivating symmetry by opting for a shade diameter that's approximately twice the width of the base at its widest point. A 6" wide base is elegantly paired with a 12" wide shade.
Shape: Elevate your decor to new heights by expertly matching the shade shape to the base—a round base with a round shade, or an angular base with a square or rectangular shade.
Versatile drum shades are our safety choice since they enhance most bases, adding a touch of sophistication to any room.
Proportion: Curate a flawlessly proportioned look by selecting a shade that complements both the lamp and the room. An oversized shade can overwhelm and dominate, while a too-small shade may appear lost and underwhelming.
Thoughtfully consider the room's overall style to create a cohesive and captivating design that reflects your unique taste.
Fitting: Ensure a secure fit by perfectly matching the shade fitting to the base. - spider fittings offer unparalleled versatility, clip-on shades attach directly to the bulb for a sleek and modern look, while uno fittings elegantly integrate with lamps featuring built-in switches, creating a streamlined and polished appearance.

Consider the following factors when choosing the right pendant light shade for your home. Source: Sustainable Jungle (3)
Before getting started, let's go through the essential tools you'll need to easily and quickly change the pendant lamp shade:

Make sure you have all the necessary materials before starting this project. Source: PaperCity Magazine (4)
Ready to update your decor or swap out that old, tired shade? Follow this quick guide, and you'll have a stylish new lampshade in no time. Let's get started!
Ensure your lamp is unplugged or switched off to eliminate any risk of electrical shock, empowering you to proceed with unwavering confidence and complete peace of mind, knowing that your safety is guaranteed.
Gently unscrew the light bulb using a soft cloth or tissue to protect it from damage, preserving its longevity and ensuring your lamp continues to provide brilliant, uninterrupted performance that will delight you for years to come.
Tip: If the bulb resists, wiggle it gently to loosen it before unscrewing.
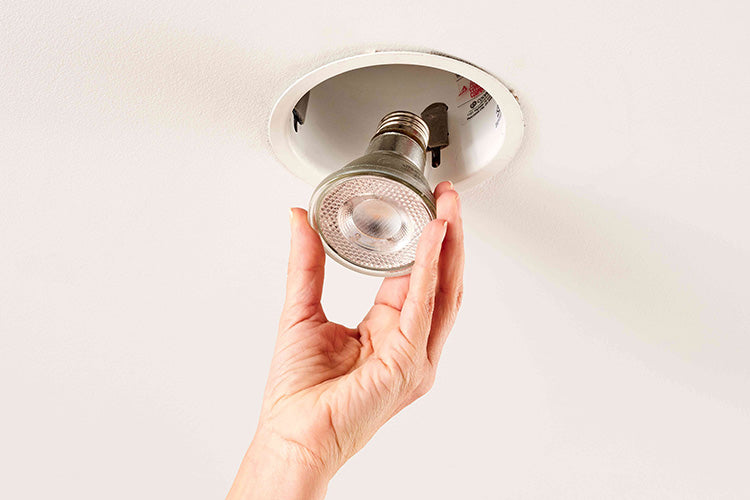
First things first: always remove the light bulb before changing the lampshade. Source: The Spruce (5)
Locate the decorative finial securing the shade to the harp and gently unscrew it, exercising the utmost care and precision to avoid applying excessive force, eliminating the risk of damaging the components and ensuring a flawless, stress-free experience.
Tip: Place a soft, plush cloth beneath the finial to cushion it if it slips, protecting your cherished lamp and surroundings from any potential harm.
Lift the old shade carefully off the harp or socket, handling it with the utmost care and reverence to prevent any unintentional harm, and place it on a soft, welcoming surface for safekeeping, ensuring its beauty is preserved for future admiration.
Tip: If the shade sticks, gently twist or rock it to loosen it, ensuring a removal without any damage.
Place the new shade evenly and securely on the base, meticulously inspecting the harp or socket for debris and cleaning it if necessary to guarantee a stable, balanced fit that will leave you in awe of your lamp's stunning transformation.
Tip: Align the seam of the shade with the back of the lamp for a neat appearance.

Choose a new shade that suits me and replace it as you like. Source: The Spruce (6)
Screw the finial back onto the harp, tightening it securely while mindfully avoiding over-tightening, ensuring proper alignment to prevent cross-threading and potential damage, leaving you with a flawlessly secured shade that radiates elegance and refinement.
Tip: Use a gentle, steady grip when tightening the finial and test the shade's stability with a gentle shake.
Insert the light bulb back into its socket, ensuring a smooth fit without overtightening. Gently twist the bulb to secure it and ensure proper contact with the socket for optimal performance.
Tip: Clean the bulb with a dry, soft cloth before reinserting to remove any dust, promoting optimal brightness and longevity.
Plug your lamp in and switch it on, ensuring the new shade complements the room's lighting flawlessly, without any glare or shadows, and adjusting the bulb if needed to achieve the perfect ambiance that reflects your unique style and taste.

Always remember to check the light after installing the new shade to ensure it is bright enough and safe to use. Source: The Lighting Company (7)
Warning: Avoid touching the bulb with bare hands to prevent oils from shortening its life and causing hot spots, ensuring a long-lasting, beautiful lighting experience.
Removing a glass lampshade is a straightforward process that requires careful handling to avoid breakage or injury. Here are the basic steps to get you started right away:
Changing a pendant light socket can rejuvenate your lighting fixture and enhance the functionality of your space. Here’s how you can tackle this DIY project to brighten up your room with ease!
Revamping your space with a fresh look and enhanced lighting is simpler than you think! Updating a light fixture can instantly elevate the ambiance and style of any room:
Similarly to changing a lampshade, to take off the lampshade, you also need to follow these steps to ensure safety and keep the old shade intact:
Introducing Rowabi, your ultimate destination for exquisite pendant lights that enhance your home lighting experience. Located in Houston, Texas, Rowabi is a beloved family-owned business with nearly five years of industry expertise.
At Rowabi, each piece undergoes meticulous craftsmanship using premium materials. We devote considerable time to model building and rigorous testing to ensure durability and longevity. Our dedication is to deliver designs that not only meet the highest standards but also stand the test of time.

If you're looking for stylish lamp shade’ provider, choosing Rowabi is the right decision for you. Source: Rowabi
In addition to our esteemed Rattan Pendant Light collection, we now introduce our latest Modern Pendant Light collection. These new additions feature stunning designs, premium materials, and exceptional durability, reflecting our commitment to innovation and quality.
Can you just change the shade on a pendant light?
Can you change the canopy on a pendant light?
How to replace a glass pendant shade?
How to put a shade on a pendant light?
Do you need an electrician to change a pendant light?
Can you change a pendant light yourself?
What is the canopy on a pendant light?
Can you adjust pendant lights?
Can you change a pendant to a spotlight?
How do you remove a glass shade?
How to disassemble a pendant light?
What is a fitter pendant shade?
How do you change a lampshade?
How do you cover a light shade?
How to remove a ceiling light cover?
Why is my pendant light not working?
Whether you're updating for a fresh new style or replacing a damaged shade, the steps are simple and require basic tools. By following these easy instructions from Rowabi, you can enhance your home's ambiance with a personalized touch that reflects your unique taste.
Remember, don't hesitate to explore different shade styles and materials to find the perfect match for your decor!
Source:


Tips for Choosing the Right Size Outdoor Wall Lights
Choosing the right outdoor wall lights can be a game-changer for your home's exterior. They provide essential illumination for safety and security while enhancing the curb appeal, creating a warm a...
Read more
25+ Best Hanging Lights Ideas in 2025
2025 is shaping up to be the year when lighting trends take a dazzling leap forward! Whether you're redecorating your entire home, refreshing a specific room, or just seeking some inspiration, Rowa...
Read more
1 comment
We purchased and installed (2) Tech Lighting Melrose II (700FJMLP) pendants over the island in the kitchen. During a delivery of a new kitchen appliance one of the Inner Shades of our Melrose 11 pendants was broken. Is it possible to order only the Inner Shade Assmebly instead of having to purchase an interior new Melrose 11 Pendant?
Sheree Friedman
Sheree Friedman
Leave a comment
This site is protected by hCaptcha and the hCaptcha Privacy Policy and Terms of Service apply.